Asters How to Plant Asters: A Comprehensive Guide

Asters, with their vibrant and diverse blooms, are a favorite among gardeners. They add a burst of color to gardens and are relatively easy to grow. This guide will walk you through the detailed steps of planting and caring for aster to ensure your garden thrives.
Understanding Asters
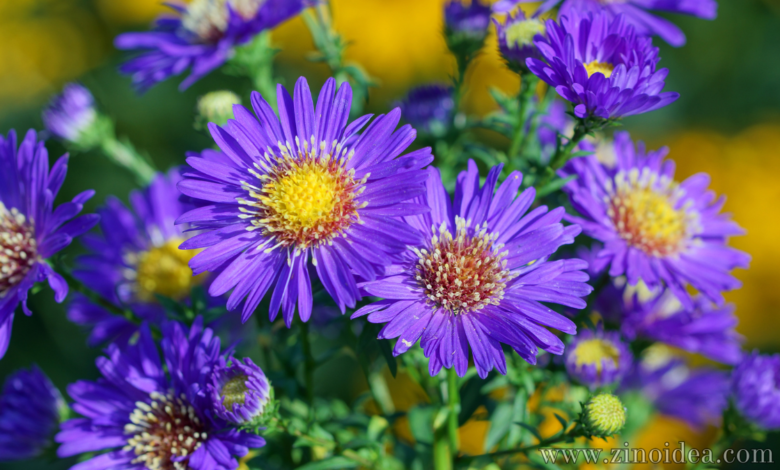
Asters belong to the Asteraceae family and are known for their star-shaped flowers. They come in various colors, including purple, pink, white, and blue. These perennials are excellent for attracting pollinators such as bees and butterflies to your garden.
Choosing the Right Variety
Before planting asters, it is essential to choose the right variety for your garden. Some popular varieties include:
- New England Aster (Symphyotrichum novae-angliae): Known for their tall stature and late bloom.
- New York Aster (Symphyotrichum novi-belgii): Slightly shorter than New England aster and also bloom in late summer to fall.
- Tatarian Asters (Aster tataricus): Tall plants with lavender-blue flowers, ideal for the back of garden borders.
- Wood Aster (Eurybia divaricata): Shade-loving and perfect for woodland gardens.
Site Selection and Soil Preparation
Asters thrive in well-drained soil with a pH ranging from 5.8 to 6.5. They prefer full sun but can tolerate partial shade. Here’s how to prepare your site:
- Select a Sunny Spot: Ensure your chosen site receives at least 6 hours of direct sunlight daily.
- Prepare the Soil: Loosen the soil to a depth of 12-15 inches. Incorporate organic matter such as compost or well-rotted manure to improve soil structure and fertility.
- Ensure Good Drainage: Asters do not like waterlogged soil. If your garden has poor drainage, consider creating raised beds.
Planting Asters
When to Plant
The best time to plant asters is in the spring or early fall. This allows the plants to establish roots before the extreme temperatures of summer or winter.
How to Plant
- Dig Holes: Dig holes that are twice as wide and the same depth as the root ball of the plant.
- Spacing: Space the plants 1 to 3 feet apart, depending on the variety. This ensures proper air circulation and reduces the risk of disease.
- Planting Depth: Place the root ball in the hole, ensuring the top is level with the soil surface.
- Backfill and Water: Fill the hole with soil, firm it gently, and water thoroughly to settle the soil around the roots.
Caring for Asters
Watering
Asters require consistent moisture, especially during their first growing season. Water deeply once a week, ensuring the soil remains evenly moist but not soggy. Mulching can help retain soil moisture and reduce the frequency of watering.
Fertilizing
Asters benefit from light feeding. Use a balanced, slow-release fertilizer in the spring when new growth appears. Avoid over-fertilizing, as this can lead to excessive foliage growth at the expense of flowers.
Pruning and Deadheading
- Pinching: To encourage bushier growth and more blooms, pinch back the stems in late spring. This involves removing the top 1-2 inches of the plant.
- Deadheading: Regularly remove spent blooms to promote continuous flowering and prevent the plant from self-seeding excessively.
- Cutting Back: After the first frost, cut back the plants to about 2 inches above the ground to prepare for winter.
Pest and Disease Management
Asters are relatively resistant to pests and diseases, but they can occasionally be affected by:
- Powdery Mildew: Ensure good air circulation and avoid overhead watering to prevent this fungal disease.
- Aphids: Use insecticidal soap or neem oil to control aphid infestations.
- Leaf Spots: Remove and dispose of affected leaves to prevent the spread of fungal leaf spots.
Dividing and Propagating Asters
Asters should be divided every 2-3 years to maintain their vigor and prevent overcrowding.
- Timing: The best time to divide asters is in early spring or fall.
- How to Divide: Dig up the entire clump and separate the roots into smaller sections using a sharp knife or spade. Ensure each division has several healthy shoots and roots.
- Replanting: Plant the divisions in prepared soil, water well, and mulch to retain moisture.
Companion Planting and Garden Design
Asters pair beautifully with other late-season bloomers such as goldenrod, coneflowers, and black-eyed Susans. They can be used in:
- Perennial Borders: For a splash of fall color.
- Wildlife Gardens: To attract pollinators.
- Cut Flower Gardens: Aster make excellent cut flowers for floral arrangements.
Overwintering Asters
In regions with harsh winters, protect your asters to ensure they return robustly in the spring.
- Mulching: Apply a thick layer of mulch (such as straw or shredded leaves) around the base of the plants after the ground freezes. This insulates the roots and prevents frost heaving.
- Watering: Water the plants well before the first frost to hydrate them for the winter months.
Common Questions About Growing Asters
Why Are My Asters Not Blooming?
Asters may fail to bloom due to insufficient sunlight, overcrowding, or nutrient imbalances. Ensure they receive full sun, are spaced correctly, and are not over-fertilized.
Can Asters Grow in Containers?
Yes, asters can thrive in containers. Choose a large pot with drainage holes, use high-quality potting mix, and ensure the container receives adequate sunlight.
How Long Do Asters Bloom?
Asters typically bloom from late summer to early fall, with some varieties extending into late fall. Regular deadheading can prolong the blooming period.
By following these detailed steps, you can enjoy a stunning display of aster in your garden. Their vibrant colors and ease of care make them a rewarding addition to any landscape.


